April 29, 2024
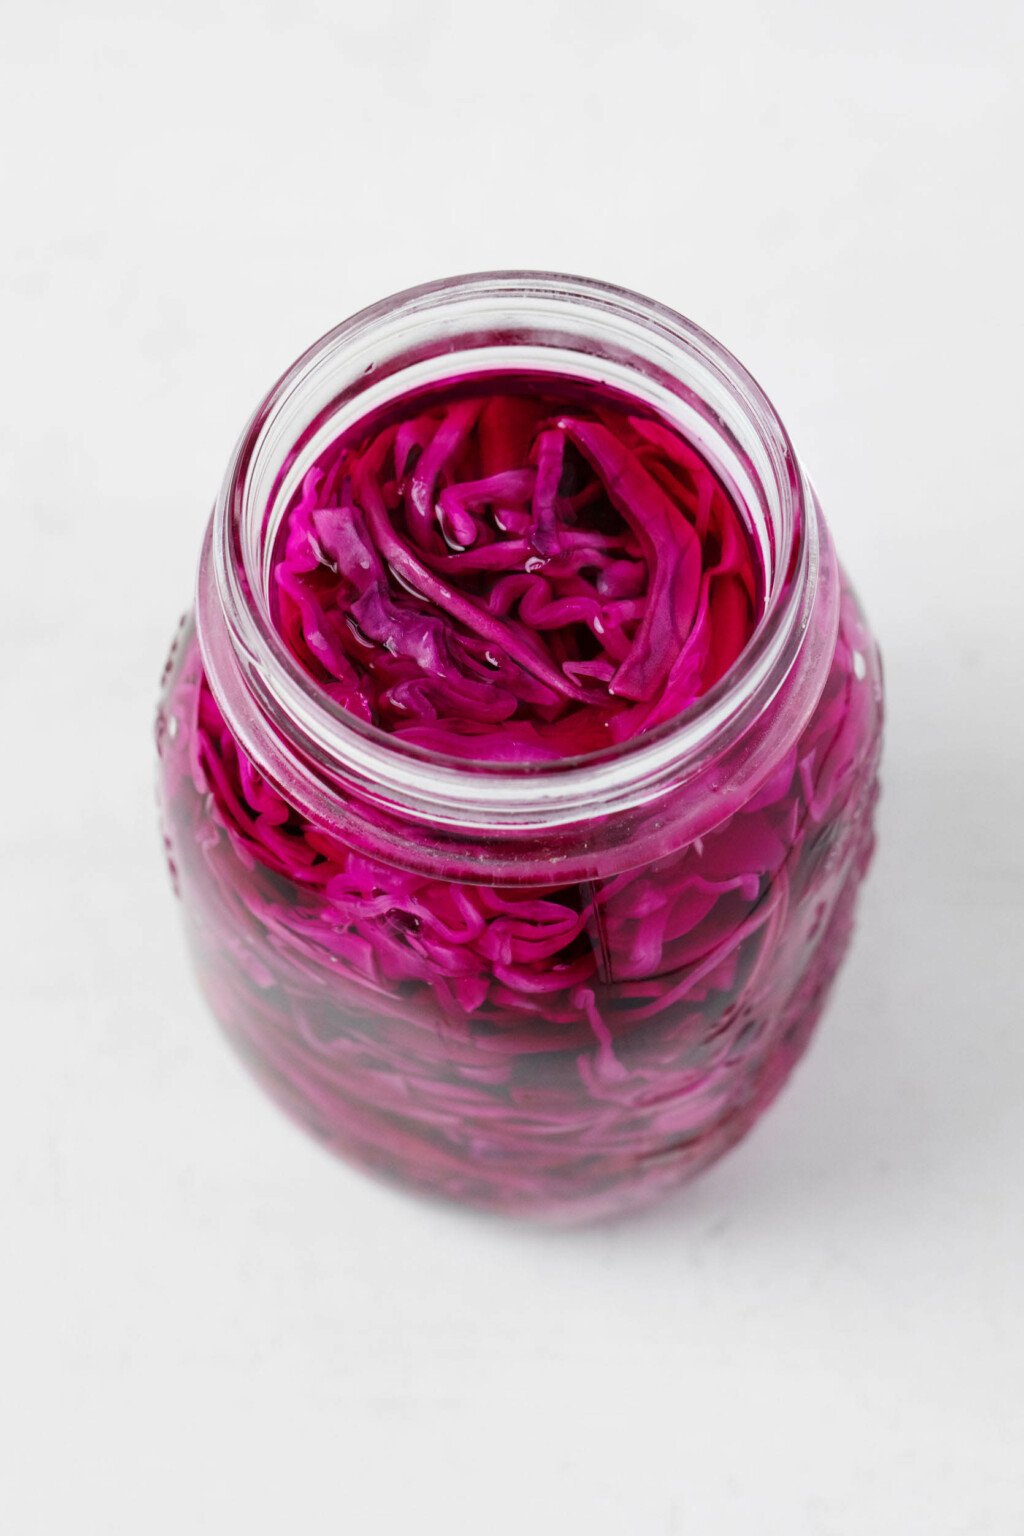
Pickled red cabbage adds color, flavor, and crunch to any salad, bowl, wrap, or taco! This is an easy preparation (no sterilization, canning, or fermentation) that will allow you to enjoy nutritious red cabbage in a wide variety of ways.
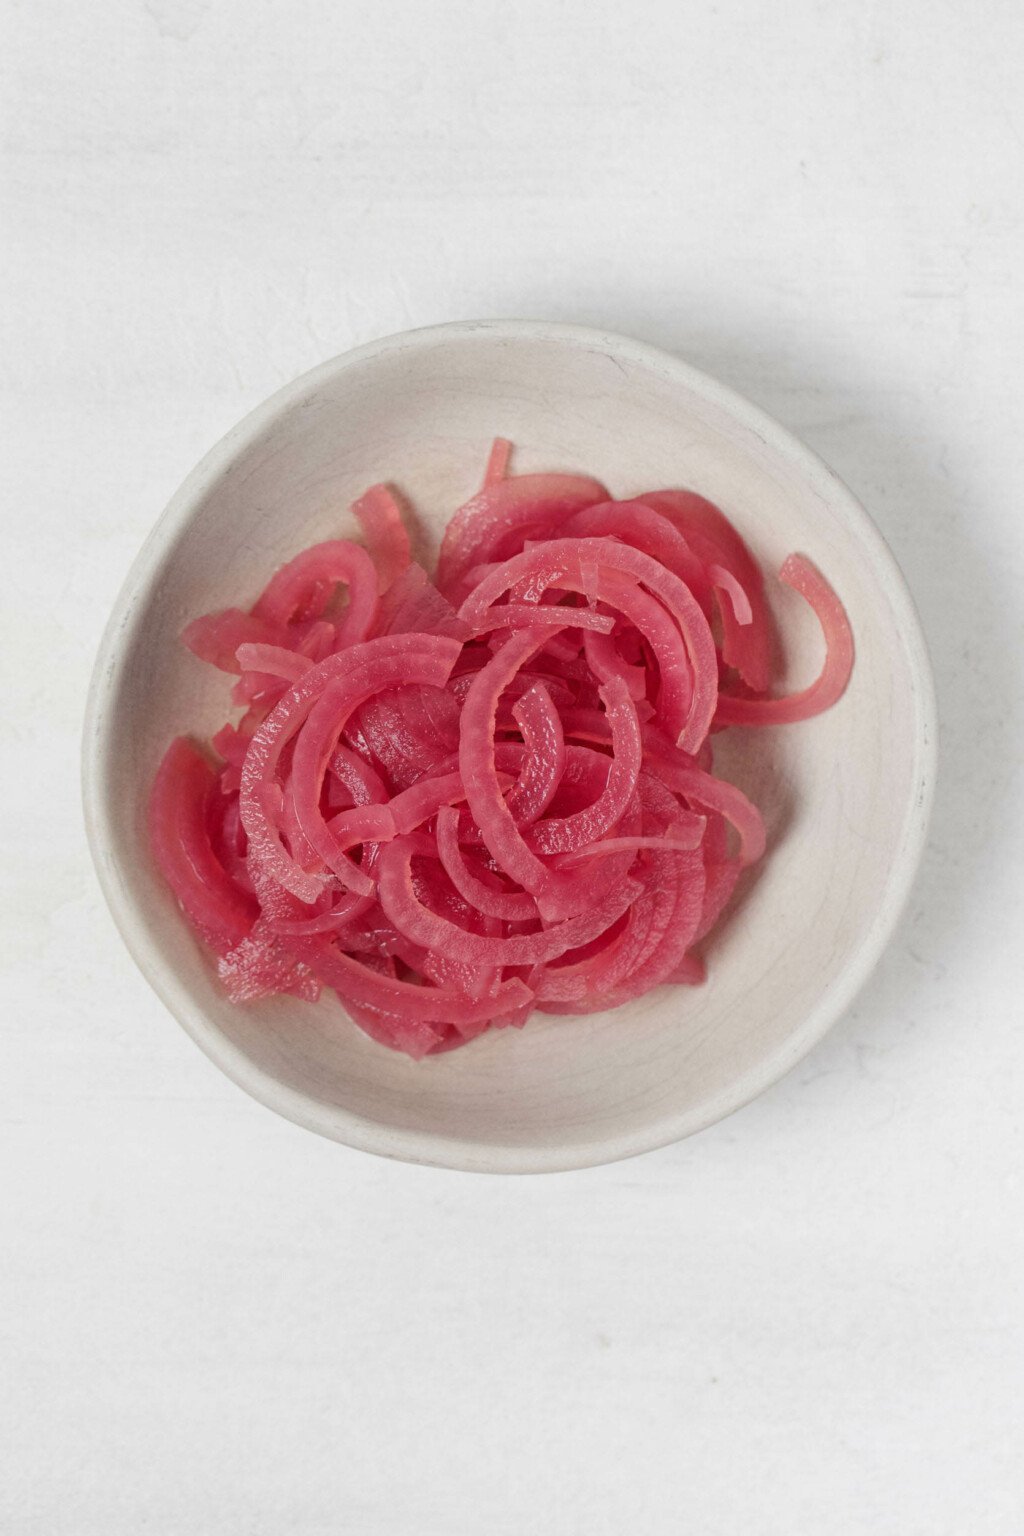
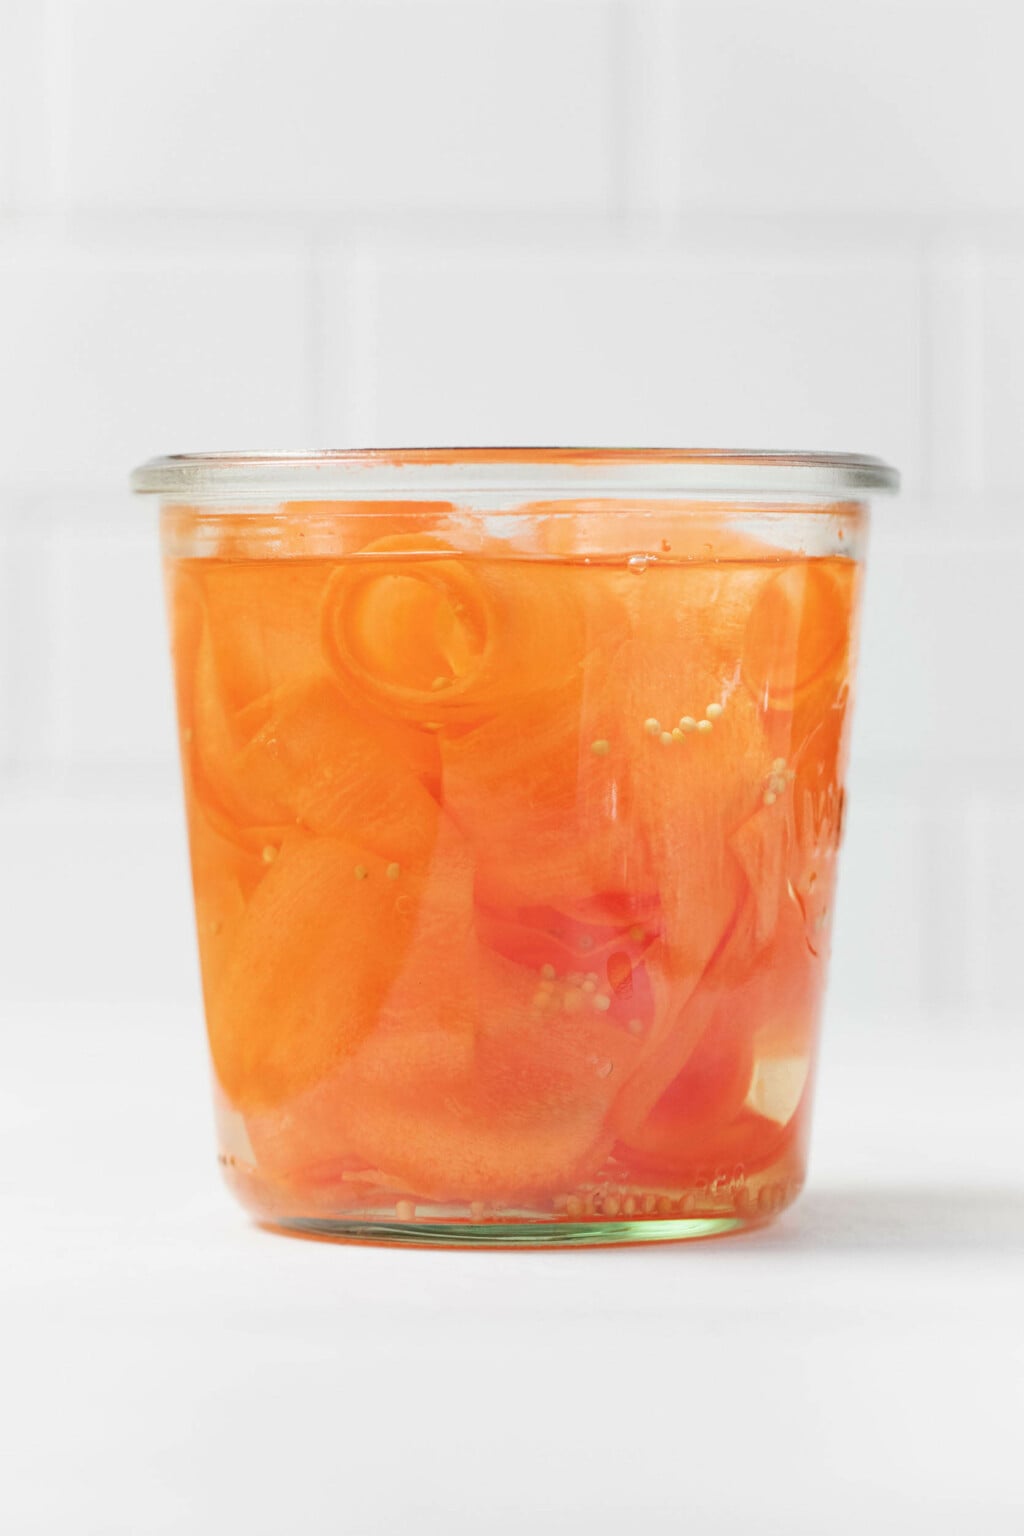
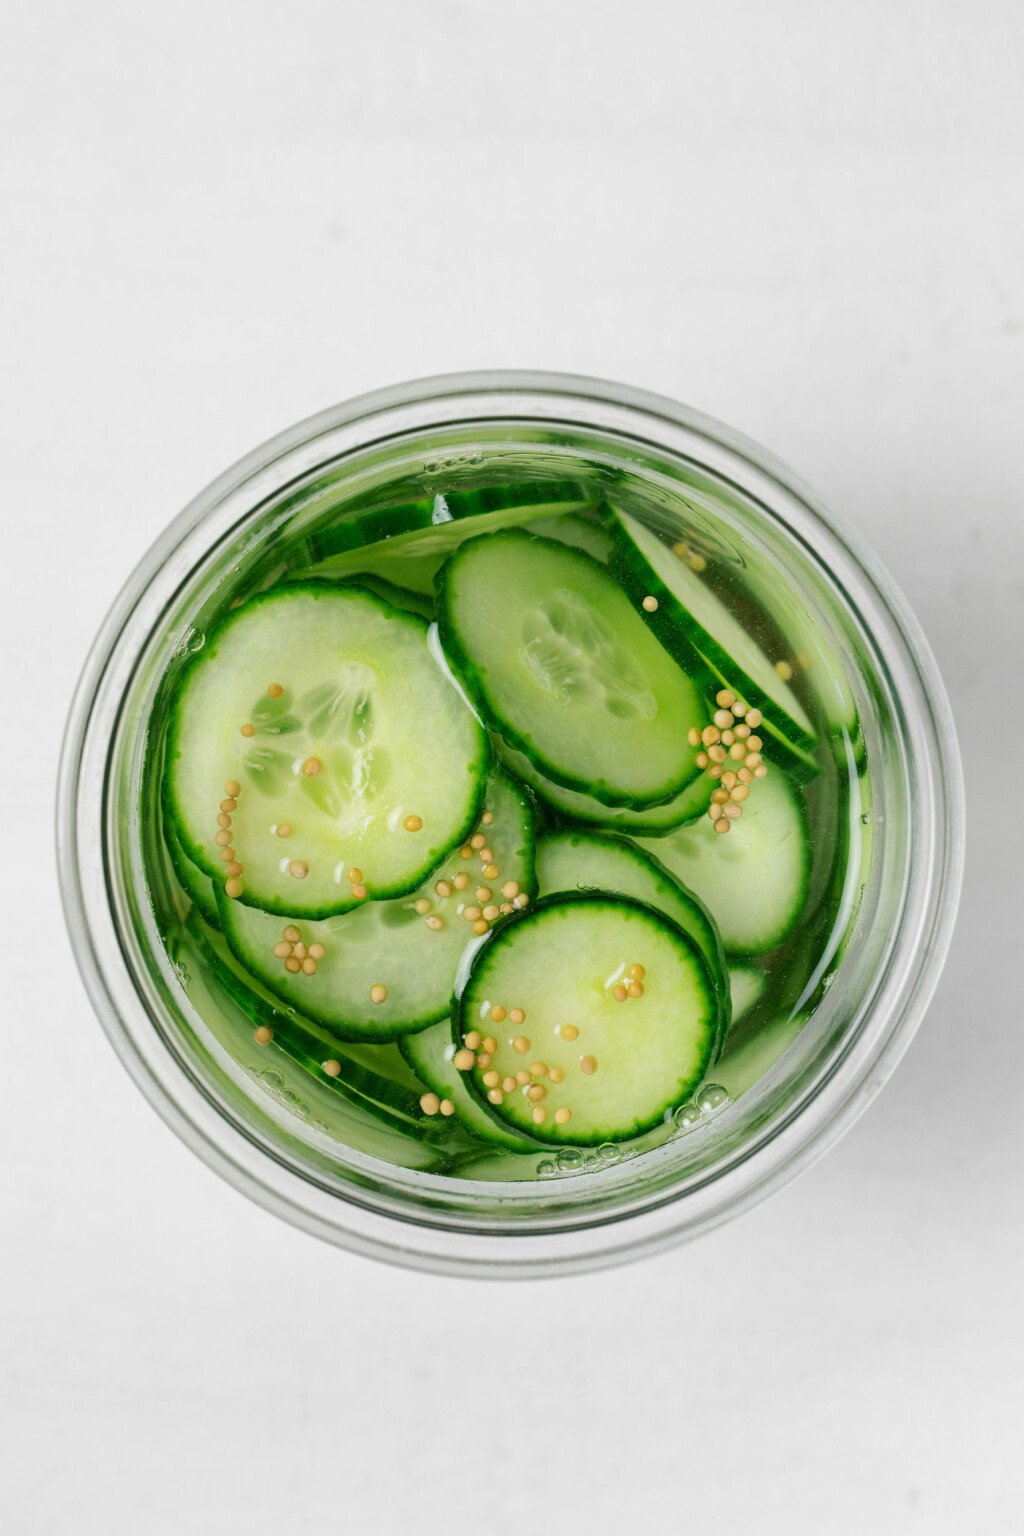
This has been my year of pickling all the vegetables, starting with cucumber slices, moving on to carrot ribbons, and not skipping over the classic: pickled red onions.
Having a jar of pickled veggies in the fridge is similar to having a good homemade dressing or sauce in that it can elevate and transform meals for the whole week.
An otherwise plain grain bowl, taco, or wrap suddenly becomes memorable when there’s a tart and tangy vegetable involved.
A layer of pickles can make your favorite lunch sandwich pop—and quick pickles taste fresher than the ones from a jar.
I’m quick to sing the praises of cabbage and think that it’s a generally under-appreciated crucifer. I guess it was only a matter of time before I got around to making quick pickled red cabbage, and now I want to put it in and on everything!
Quick pickling 101
When you think about making homemade pickles, your mind might turn to the image of a giant canning bath, tongs, and sterilized jars—basically, a bunch of specialized equipment.
This is true for pickles that are meant to be preserved for a long time, just as it’s true for homemade jam or jelly that’s meant to sit in the pantry before opening.
Quick pickles, like the pickled red cabbage that I’m sharing today, work differently.
Also known as refrigerator pickles, quick pickles don’t require a water bath or proper sterilization. Pickling happens through the simple process of pouring a hot or cold pickling liquid over vegtables, then allowing them to marinate.
The marinating process is enough to give quick pickles tangy, salty flavor, but as the name implies, it’s not a lengthy procedure.
Because quick pickles don’t go through a water bath, they’re not meant to be stored indefinitely. They also need to be kept cold, in the fridge.
But rarely do I make a batch of pickled veggies that lasts for a whole two weeks.
They’re so versatile and useful that it’s hard not to finish a jar within days.
Is pickled cabbage the same as sauerkraut?
Pickled cabbage and sauerkraut: they’re similar, and I love them both, but they’re not actually the same.
Sauerkraut, like pickled cabbage, is tangy and salty. What makes it unique is that it’s been lacto-fermented: bacteria have converted some of the naturally occurring sugar in cabbage into lactic acid.
Lacto-fermented vegetables have a sourness and “funky” flavor that’s unique; quick pickled cabbage is similarly tart, but it’s not as complex as sauerkraut.
For the record, sauerkraut really isn’t hard to make. But I’d argue that this pickled red cabbage is easier, faster, and just as versatile, if not more so.
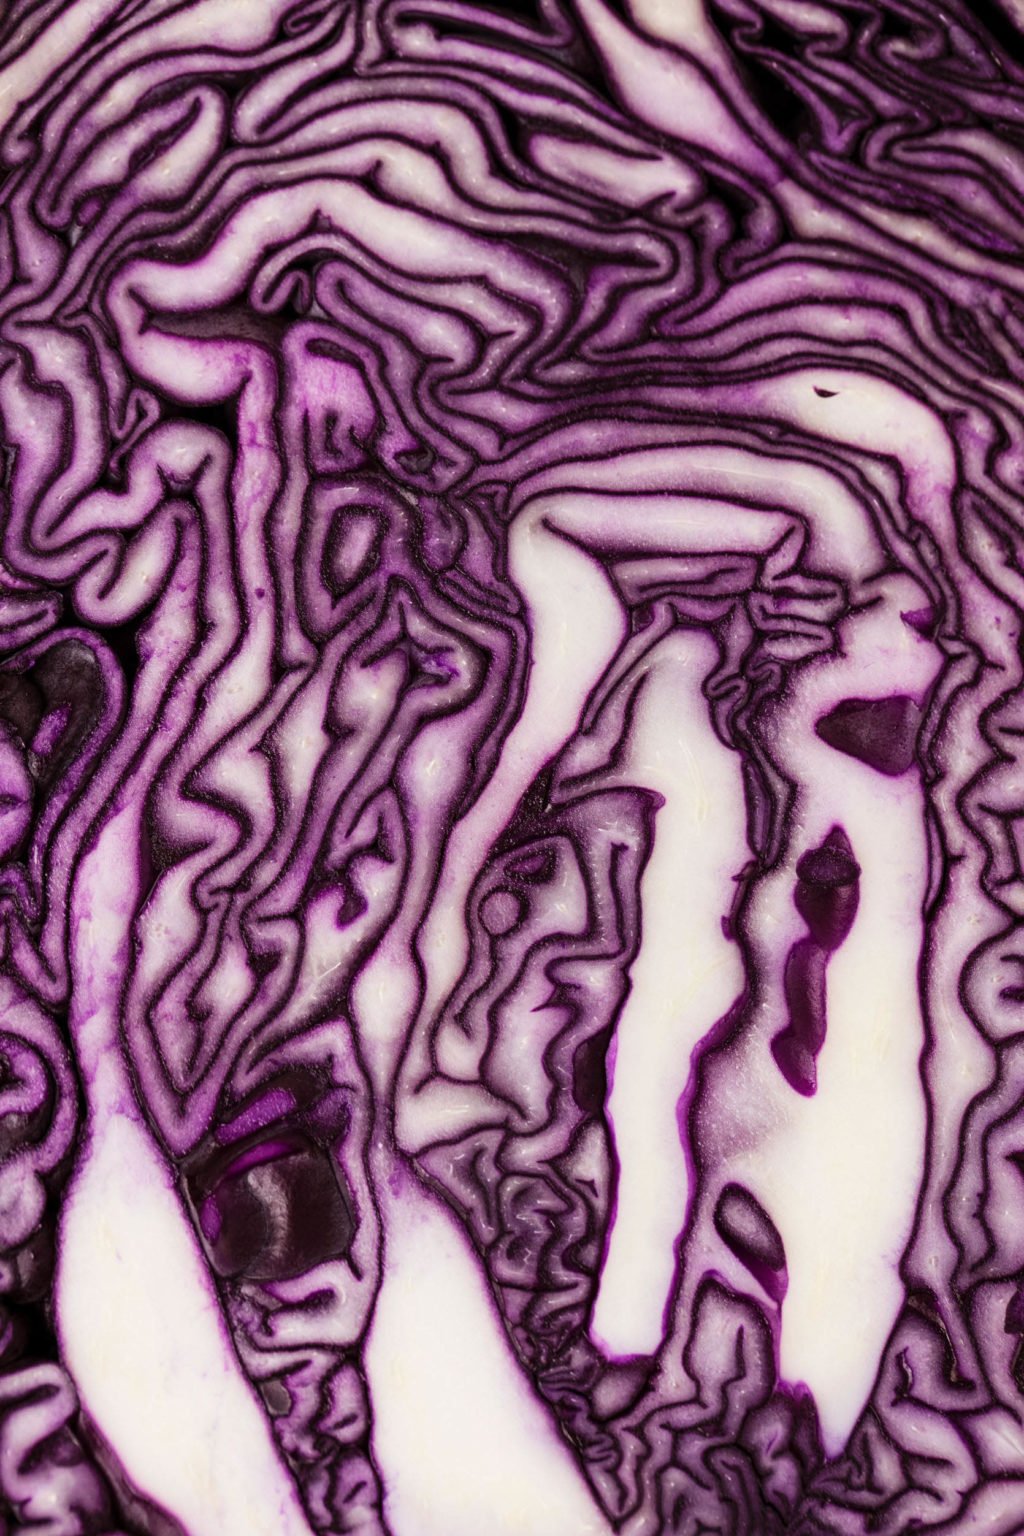
Why red cabbage?
Easy: color! I love the electric pink color of pickled red cabbage, in the same way that I love the deep purple color of my braised red cabbage.
Both green and red cabbage are ultra-nutritious, packed with Vitamin C, Vitamin K, phytosterols, and dietary fiber.
You can read more about my love of this vegetable, and the many recipes that I make with it, in my roundup of twenty cabbage dinners and sides.
Red cabbage is distinctive in that it’s also a source of anthocyanins. These are plant pigments that are found in red and purple foods (think blueberries, beets, grapes, etc.) and have antioxidant activity.
There’s some evidence that a diet rich in anthocyanins may have cardioprotective benefits.
You can absolutely follow this pickled cabbage recipe using green cabbage, rather than red. But if it’s easy enough to source red cabbage, know that its color is as nutritionally valuable as it is a treat for the eyes.
How to make pickled red cabbage
Preparing the pickled cabbage couldn’t be easier. As proof, I’ve made a big jar every week since I first started testing a recipe to write about.
Here are the steps.
Step 1: Prepare the cabbage
You can slice cabbage for pickling with the shredding attachment of a food processor, with a food slicer (I swear by this one), or by hand, using a sharp chef’s knife.
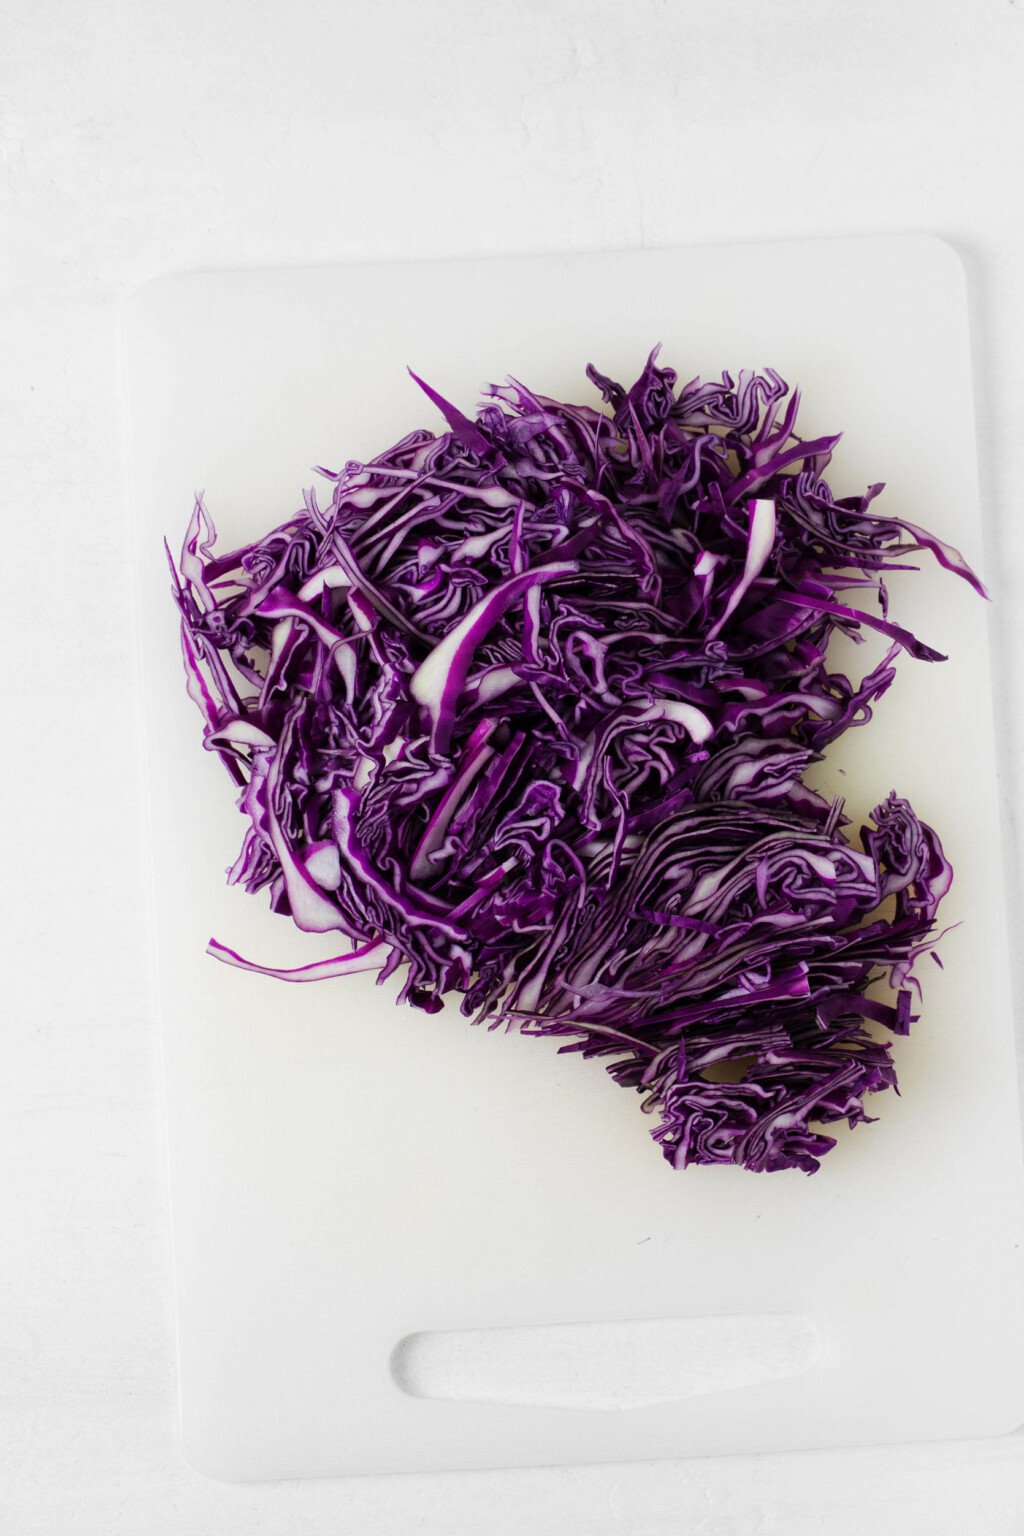
Be sure to core your cabbage before slicing it.
Unless you’re making a double or triple batch, you’ll use half a head of a small or medium sized cabbage. If your red cabbage is giant, you may only need to use a quarter of the head.
In the end, you should have about four lightly packed cups, or 200 grams, of thinly sliced cabbage to work with.
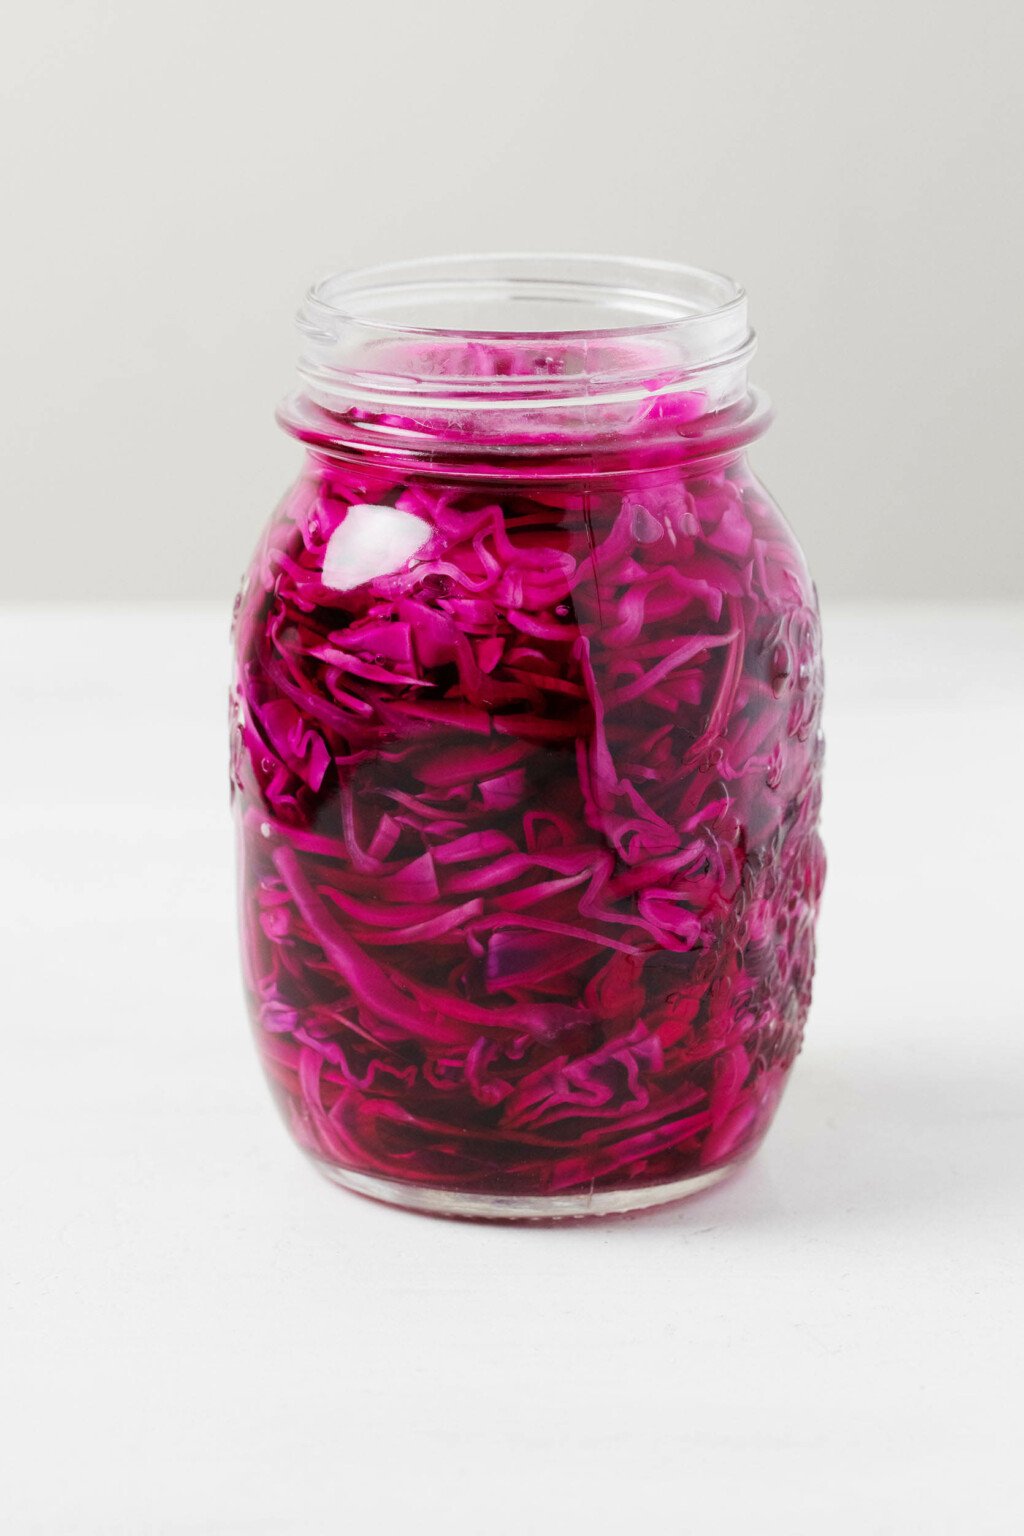
At this point, you’ll stuff the cabbage into a vessel for pickling.
I like to use a 32-ounce / 950ml / 1 quart mason jar; I actually keep these around for food storage in my apartment, so there are always a few spare ones at the ready.
If you don’t have larger mason jars at home, you could use a couple smaller mason jars or any other non-reactive, airtight container that can be stored in the fridge.
Step 2: Prepare the pickling liquid
There are two options for preparing your hot pickling liquid. In either case, you’ll first stir together vinegar and water in a heatproof measuring cup.
You can pour this mixture into a saucepan and bring to a simmer, then stir in sugar and salt—core components of pickling liquid—until they dissolve.
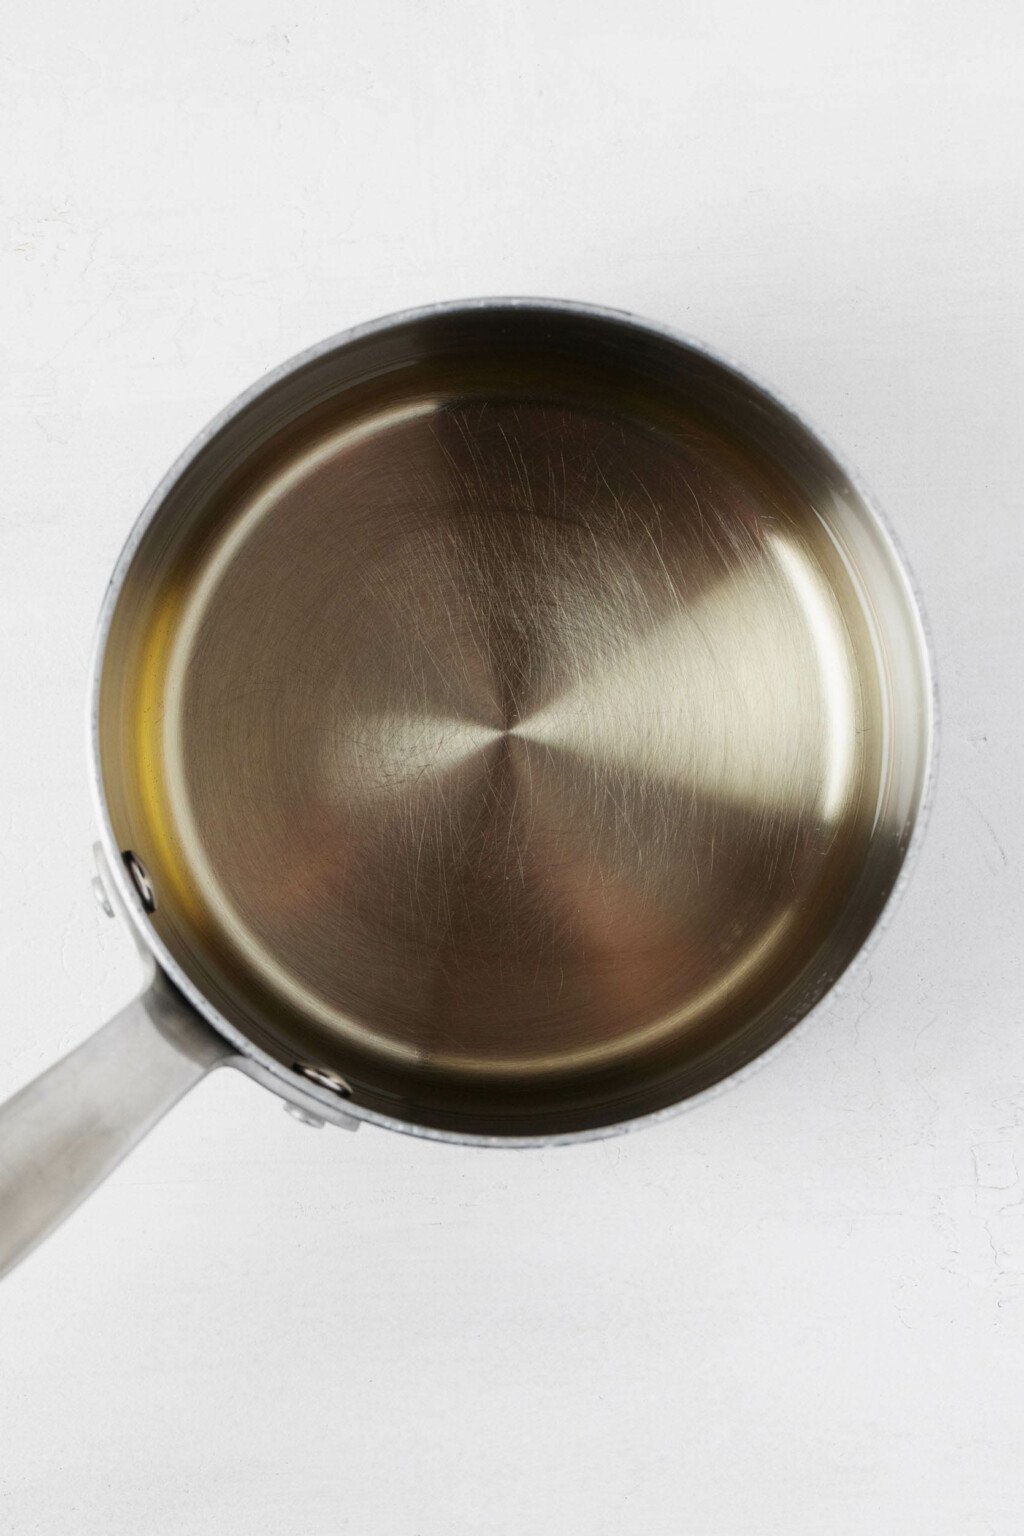
Alternatively, you can microwave the water and vinegar for 3 minutes, then stir in the sugar and salt until they’re dissolved.
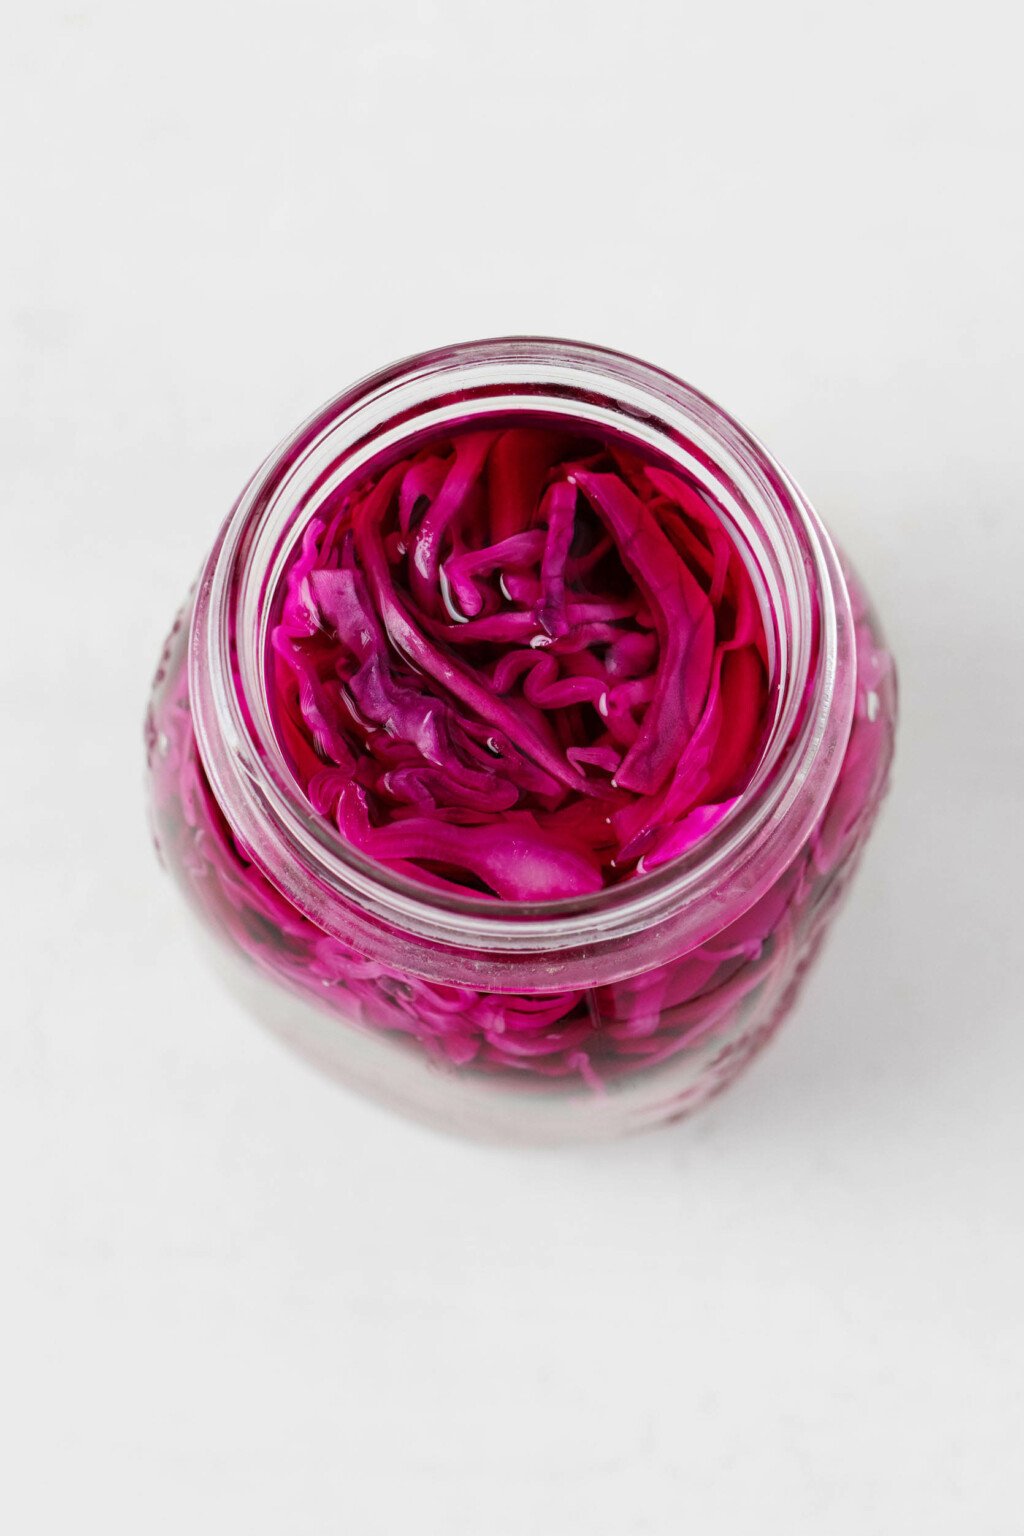
Step 3: Pickle the cabbage
The next step in making your pickled red cabbage is to pour the hot pickling liquid over the cabbage in the jar. A funnel can help with this, but it’s not necessary.
Be sure to submerge the cabbage completely, pushing it down with the back of a spoon if you need to. Loosely cover the jar (you don’t need to screw the cap on tightly yet).
Step 4: Let the cabbage rest at room temperature
Don’t transfer your cabbage to the fridge just yet. Instead, allow it to sit at room temperature for an hour. This helps to soften the cabbage.
Step 5: Transfer to the fridge and store
After an hour, you can close the lid on your jar (or other container) tightly, then transfer the container to your fridge.
The pickled red cabbage will be ready to eat on the following day, but it will get a little more flavorful after sitting for a few days. You can store it for up to two weeks.
Why does the pickling liquid have to be hot?
Good question!
Recipes for quick pickles sometimes call for heating the pickling liquid, but many of them don’t.
Technically, it isn’t necessary for the pickling liquid to be brought to a simmer before pouring it over whatever vegetables are being pickled.
Using a hot liquid helps to soften the vegetables a little at the very start of pickling. The heat isn’t responsible for pickling; really, it’s the acid and salt in the pickling liquid that are to thank for the flavor of quick pickles.
But the heat is helpful when it comes to tenderizing.
This becomes especially important in the case of cabbage, which is a pretty tough vegetable to begin with.
I don’t think that it’s absolutely essential to heat the liquid for, say, quick pickled cucumber slices, as they’re so thin and soft already.
When I tested the quick pickled red cabbage with and without heating the pickling liquid, however, I did see a difference. The jar that I prepared with hot liquid turned into a more tender pickled cabbage.
The pure “refrigerator pickle” version—the one that I used cold pickling liquid for—ended up with a texture that was a little tough and sort of squeaky to eat.
If you pickle your cabbage without heating the liquid, I don’t think that the finished product will be ruined by any stretch. But I’d suggest that you might like the texture a little more if you pickle with hot brine.
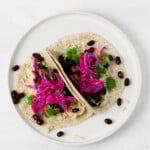
A perfect taco topper
Once you have a cold jar of pickled red cabbage waiting for you in the fridge, there are so many tasty uses for it.
One thing I like to do is to use it as a crunchy component for soft tacos.
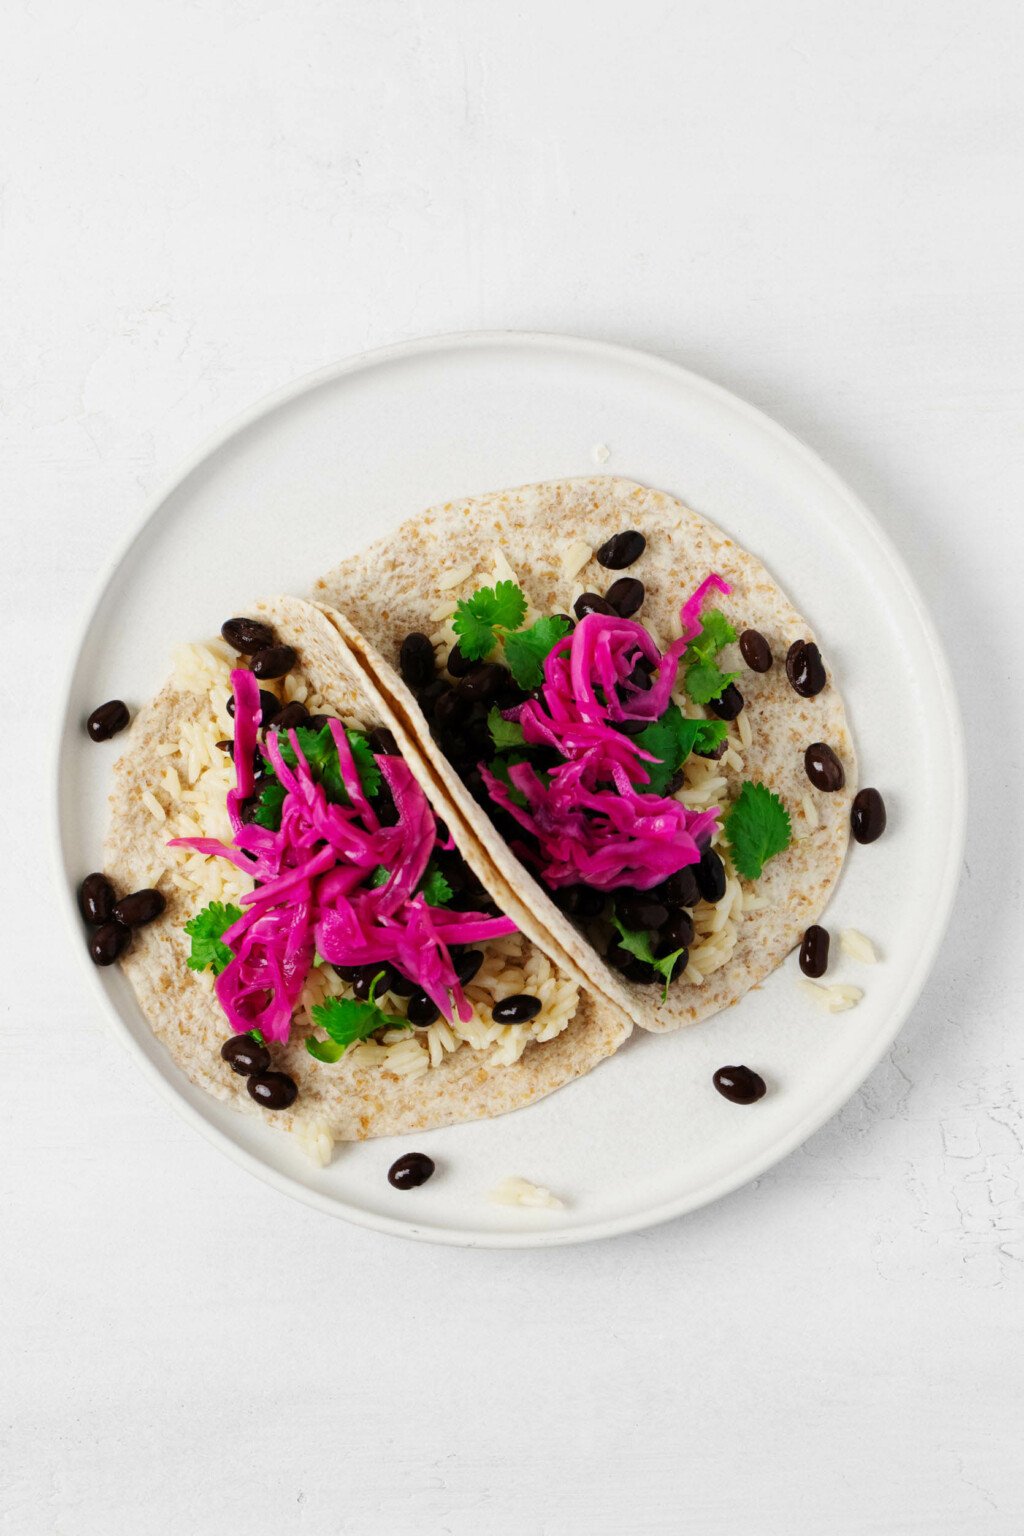
Those tacos don’t have to be at all complicated.
One very straightforward, yet still tasty and filling, combination is cooked rice, black beans, avocado slices, and the pickled red cabbage. A garnish of cilantro is a nice touch.
If you’d like something a little more developed, you could try the pickled cabbage on:
- Crispy cauliflower chimichurri tacos
- Portobello mushroom tacos
- Easy tacos with crumbled tempeh
- Roasted carrot lentil tacos
- Vegan sweet potato tacos with black bean spread
Or, you could use any combination of smoky, refried beans, a simple vegan protein (tofu, tempeh, seitan, beans), avocado or guacamole, and the cabbage.
Other ideas for using quick pickled red cabbage
Try layering the pickled cabbage into your next wrap. I just posted about buffalo soy curl “chicken” wraps, and I think that the cabbage would be a great addition to that recipe.
It would also be great with my lentil tahini wraps, which are a longtime lunchtime go-to.
And of course, pickled things are always a nice addition to your next vegan lunch bowl. You choose the other components, but if you feel supported by working from a recipe, a few options:
- Roasted chickpea quinoa bowls with creamy ranch dressing
- Quinoa beet bowls
- Chickpea burrito bowls
- Chili roasted cauliflower and brown rice kimchi bowls
- Macro bowls
- Harvest bowls
- Turmeric rice bowls
If none of that suits your fancy, you could try using the pickled cabbage as a topping for a batch of tofu scramble. Or a delicious topper for avocado toast.
As is the case with most pickled veggies, you’ll probably come up with tons of uses once you make the quick pickled red cabbage. So without further ado, here’s that recipe.
Quick Pickled Red Cabbage
Author –Yields: 4 cups
Ingredients
- 1/2 head red cabbage (or one quarter head of an extra large red cabbage)
- 3/4 cup apple cider vinegar, distilled white vinegar, or unseasoned rice vinegar (180ml)
- 3/4 cup water (180ml)
- 1 1/2 tablespoons cane sugar
- 1 teaspoon fine salt
- Optional add-ins: 1 clove garlic, finely minced, 2 teaspoons mustard seeds, 2 teaspoons caraway seeds, pinch red pepper flakes
Instructions
- Using a vegetable slicer, a food processor fitted with the shredding attachment, or a sharp chef's knife, thinly slice or shred the cabbage. You should have about 4 lightly packed cups (200g) after preparation. Stuff the cabbage into a 32-ounce / 950ml / 1 quart mason jar or another non-reactive storage container with a tight-fitting lid.
- Stir together the vinegar and water in a heatproof measuring cup. Pour this mixture into a saucepan and bring to a simmer, then stir in the sugar and salt until they dissolve. Alternatively, microwave the water and vinegar for 3 minutes, then stir in the sugar and salt until they're dissolved.
- Pour the hot pickling liquid over the cabbage in the jar. Be sure to submerge the cabbage completely. Loosely cover the jar (you don't need to screw the cap on tightly yet).
- Allow the cabbage to sit at room temperature for 1 hour. Then, seal the jar tightly and transfer it to the fridge for up to 2 weeks. Enjoy the cabbage in tacos, sandwiches, salads, or bowls.
In other news, it’s very like me to go a few weeks without posting any recipes, then post two in three days. One of these days I’ll get a handle on consistency 😉
In the meantime, thanks for bearing with me through the pauses and returns. And I’ll be back with a sweet treat later this week!
xo
This post may contain affiliate links. If you use these links to buy something I may earn a commission. Visit my privacy policy to learn more.
Categories: Vegan Basics
Ingredients: Cabbage
Dietary Preferences: Gluten Free, No Oil, Soy Free, Tree Nut Free, Vegan
Recipe Features: 30 Minute or Less
Ingredients: Cabbage
Dietary Preferences: Gluten Free, No Oil, Soy Free, Tree Nut Free, Vegan
Recipe Features: 30 Minute or Less


Leave a Comment
Can I leave out sugar? ISSUES.
Hi Barbara! You can leave it out—the pickling process will work just fine without it—just know that the cabbage will be especially tart/sour.
Such a beautiful recipe. Will try it soon.
I hope you enjoy!